- Home
- Heating With Wood
- Stone Fireplace
Building A Stone Fireplace
This post may contain affiliate links so I earn a commission.
A beautiful stone fireplace made from stacked stone is a great way to create the perfect look for your living room.
After all, a fireplace is the focal point of the room.
You want something that people are going to notice and enjoy throughout the entire year, especially in the winter when everyone gathers around a hot fire.

There's a lot of different options when choosing the material such as brick or even tile, but a stacked stone construction seems to be everyone's favorite....including mine.
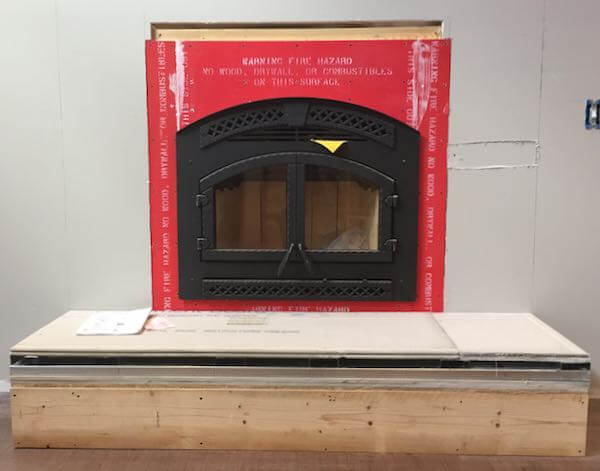
Recently, I installed a new Heat & Glow Northstar high efficiency zero clearance wood burning fireplace in my living room.
Since it was a new home and the focal point of the living room, I not only wanted my fireplace to heat the home, I also wanted it to look amazing.
To create the perfect look I decided to have stacked stone placed around the fireplace along with a barn beam mantel across the top.
The results were amazing!
To learn more, lets look at the process so you can create something you'll cherish for a lifetime.
Building A Stone Fireplace
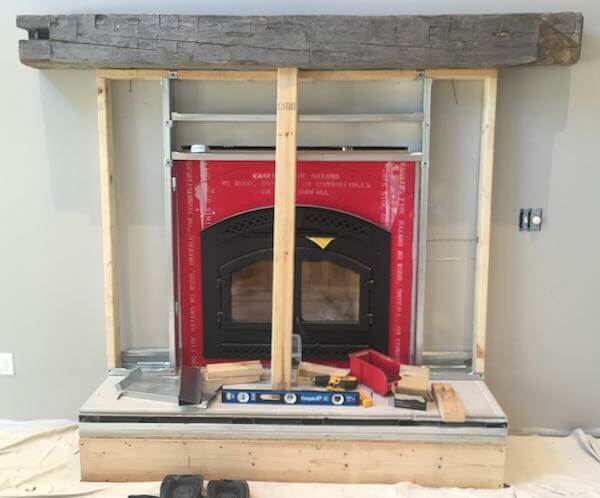
The project started with the rough installation of the Heat & Glow Northstar wood burning fireplace.
I opted for a hearth height of about 14 inches which is the perfect height for sitting in front of the fire.
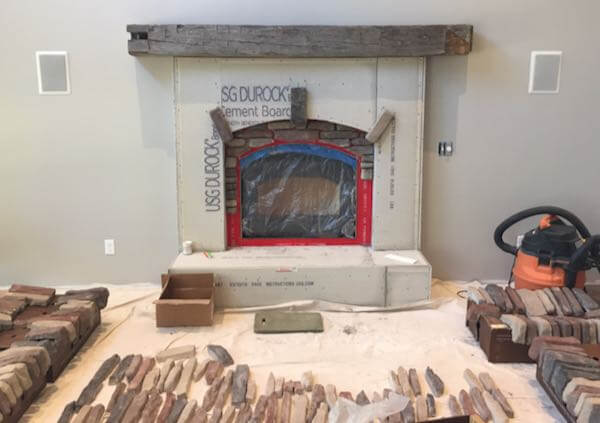
Non flammable material was placed around the fireplace and on top of the hearth.
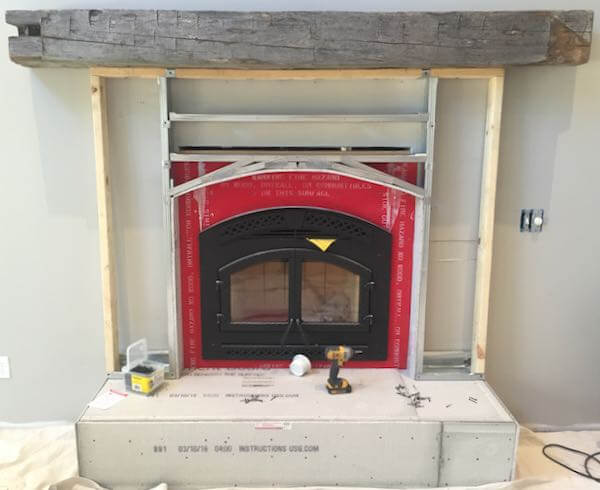
The next step was to rough out the general shape of the stone fireplace.
You'll notice metal 2x4's were used around the fireplace to prevent any combustible material from contacting the hot surface.
The barn beam mantel was secured to the top and the 2x4 you see in the middle was simply used as a temporary brace to hold up the heavy beam.
Next, the rounded shape above the fireplace was constructed using the metal 2x4's and non combustible material to create the classic "arch."
You'll also notice the hearth is now covered in non combustible cement board.
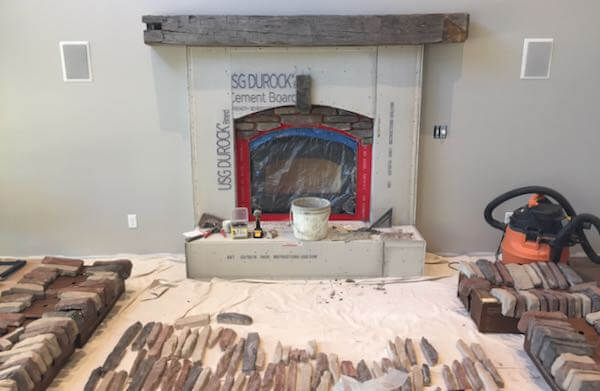
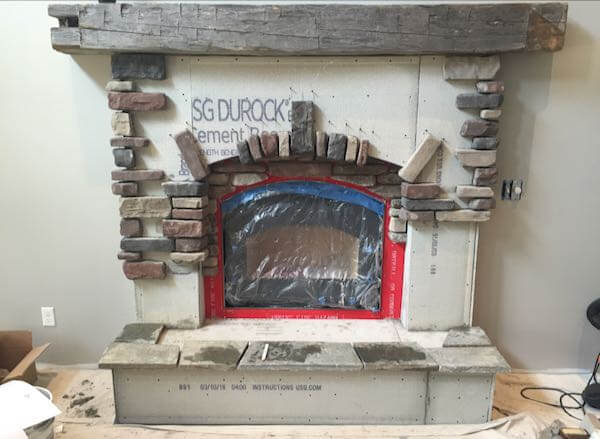
Next, lay out your stones and separate them according to size.
Put all corner pieces together and all flat pieces together. This will help when you begin the installation of the stone.
The picture below also has the keystone in place centered in the arch.
The keystone (and other stones on the arch) should be a corner stone so it wraps along the inside of the arch, making a finished appearance.
The stone is attached to the cement board using mortar as recommended by the stone manufacturer.
Here's a closer look of the stone work process.
Smaller flat stones were used on the face of the fireplace and the keystone is centered in the middle of the arch.
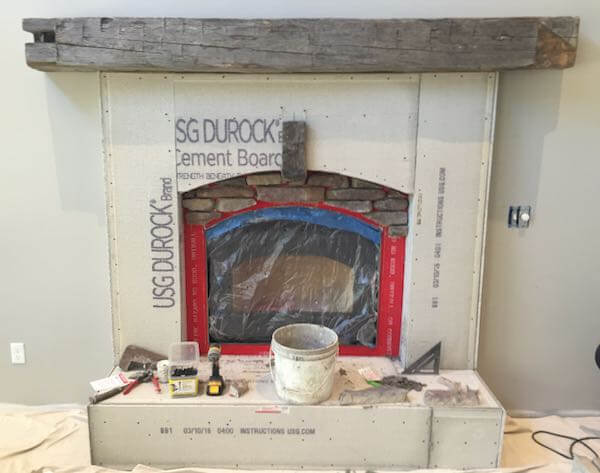
Next, select 2 more corner stones to be used as the outside keystones.
You'll want all 3 of these stones to be similar in size and appearance for a uniform look.
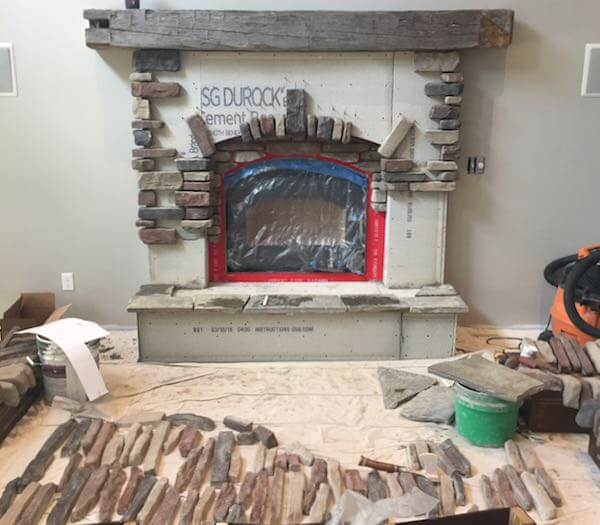
Now, simply use the mortar to install the rest of the stacked stones.
You'll want to pick and choose which stones will fit to achieve a random and flowing look.
Some stones will need to be cut to size.
A flat slate type material was used for the top of the hearth.
The front and sides of the hearth were also covered using the stacked stone.
Here's another view of the progress.
After a few days of laying the stacked stone, the stone fireplace was complete.
Fill in the gaps between the stone with mortar for a finished look.
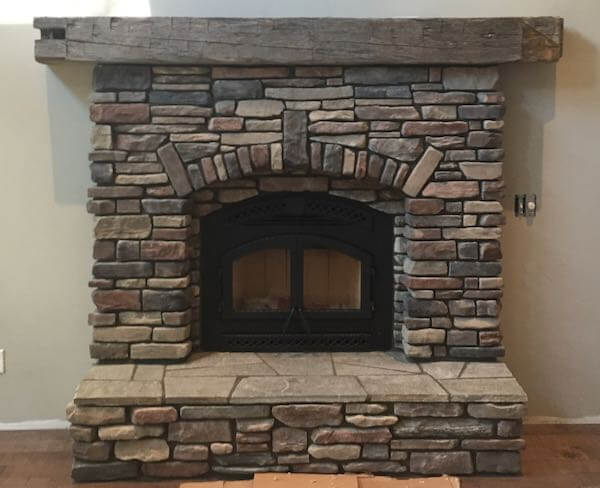
Although this project requires more corner stones which can be somewhat pricy, the arch look along with the 3 keystones and inset fireplace looks amazing.
This is definitely the focal point of the room and everyone comments how nice the project turned out!
Using The Northstar High Efficiency Fireplace
After several years of use, I'm very impressed with the Heat & Glow Northstar fireplace.
This high efficiency unit easily heats my entire home and looks great in the process.
The only drawback to heating with a fireplace insert as opposed to heating with a traditional wood stove is the need for a blower to circulate the hot air.
Since the insert is mounted inside the wall, it doesn't allow the radiant heat to fill the room like you would get from a wood burning stove.
I've noticed that keeping the glass clean on the doors helps transfer more heat into the room, but the blower does a great job at heating the house.
The blower is starting to get a little loud and it's not uncommon for the bearings to ware out over time, which is what I believe is happening.
The blower motors are easy to replace, so I'll probably need to replace it sometime in the next couple of years.
Maintaining the fireplace insert is really easy as well. Aside from cleaning the glass about 1-2 times per week, I clean out the ashes about once a week and that's it.
High efficiency stoves like the Northstar work best with really dry, seasoned firewood.
I've found that burning semi wet wood really causes creosote to build up quickly when compared to burning dry firewood.
Stone Fireplace - Overall
Whether you're building a new home or just remodeling a family room, consider using stacked stone for your stone fireplace.
Although it takes a little longer to install, it looks beautiful and will last a lifetime!

About the Author
Obsessed with firewood, Nick is behind over 350+ of Firewood For Life's articles, as well as countless reviews, guides and YouTube videos to help readers like you reduce heating costs and create the perfect fire.
Recent Articles
-
Firewood Measurements - Firewood Cord Calculator
 Firewood measurements such as a cord, face cord or rick can be confusing. Use this free firewood calculator to determine exactly how much firewood you have.
 -
Alder Firewood - A Good Firewood Choice?
 Should you burn alder firewood in a fireplace, wood stove or campfire? Learn how to split, stack and dry alder for the best results.
 -
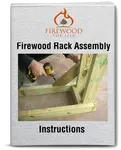
Firewood Rack Assembly Instructions - Build Your Own Log Rack
 Use these easy to follow firewood rack assembly instructions to build your own rugged and durable outdoor firewood rack.