- Home
- Chimney Guide
- How to Build a Chimney
How To Build A Chimney
This post may contain affiliate links so I earn a commission.
If you want to learn how to build a chimney, there are several things you need to take into consideration before getting started.
Building a masonry chimney doesn’t require a professional, which can save you a lot of money, but knowing how a chimney works and the importance of building it correctly, can save you from experiencing a dangerous and potentially deadly house fire.
Before building any chimney you should check your local building code requirements to make sure you adhere to your local rules and regulations.
After all, these rules and regulations are put in place for a reason......your safety.
Also, keep in mind that everyone wants to save money.
If you don't feel comfortable with the project, sometimes it pays to just hire a professional who builds chimneys for a living.
However, if you have some masonry experience and you're confident with do-it-yourself type projects, building a chimney yourself is not only rewarding, it's a lot cheaper.
For starters, visit the National Fire Protection Association to view many local codes and regulations.
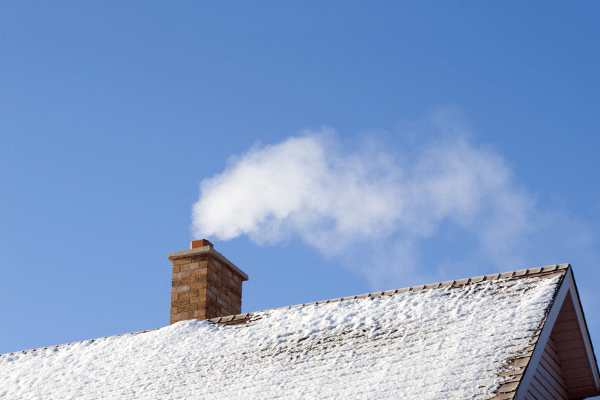
Functions Of A Chimney
Before you learn how to build a chimney, you should first understand how a chimney works.
Chimneys have two main functions.
First, they create a draft which pulls in the required oxygen for creating combustion.
Second, they release the combustion products outside the home’s living area keeping the air inside your home clean and safe to breathe.
The draft is created when warm air (or smoke) naturally rises up through the chimney.
Generally speaking taller chimneys create more draft than shorter ones.
Outdoor air currents can sometimes affect draft if they have to blow around obstructions such as areas of the roof or nearby trees.
These obstructions cause the air to blow down the chimney instead of across its outlet.
These air currents affecting draft are called eddy currents.
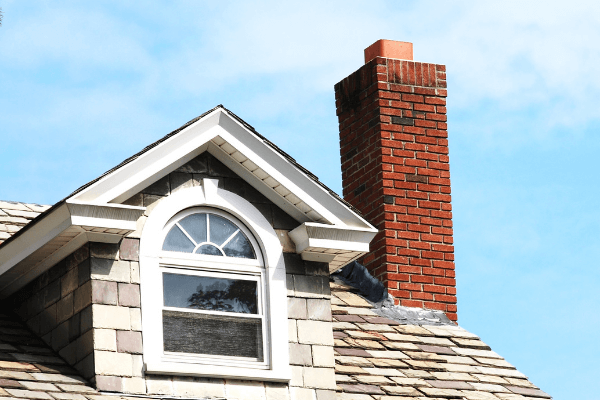
Therefore, chimney height needs to be a minimum of 3 feet above flat roofs and at least 2 feet above the roof ridge or any raised portion of the roof within 10 feet.
At times, it may be impossible to get enough vertical clearance to prevent eddy currents from affecting the draft.
This is when a chimney cap or chimney hood is installed to minimize the effect eddies have on the draft.
The use of caps and hoods on the chimney also help in the prevention of rain entering into the chimney when it’s not being used.
How To Build A Chimney - Planning
When learning how to build a chimney, you should first understand the purpose of a chimney flue.
A chimney flue is the opening where smoke passes.
Flues for masonry chimneys are typically rectangular or square, whereas metal chimneys are usually round.
Multiple flues can be used to discharge byproducts if meeting certain conditions:
- Connecting flues are only discharging similar byproducts. For example, you can have multiple flues for gas-operated appliances, but you cannot have multiple flues if you are discharging burning wood from one and gas in another.
- The slope of the flue isn’t greater than 30-degrees off vertical.
- The shape and size of flue cannot change within 6-inches of any points where the chimney is going to pass through floors, roofs or ceiling areas that are combustible.
- Combined flues should have the main discharge flue appropriately sized to achieve the maximum amount of flow from the connecting smaller ones. For example, masonry flues venting only a fireplace should be 13 x 13-inches. Whereas, a flue venting a stove and central heater should be 7.5 x 7.5-inches or 8.5 x 8.5-inches. Metal chimneys need to be 6- to 7-inches in diameter for venting stoves and central heating systems, or 8-inches in diameter for venting central heating systems, fireplaces and stoves.
How To Build A Chimney - Masonry Tips
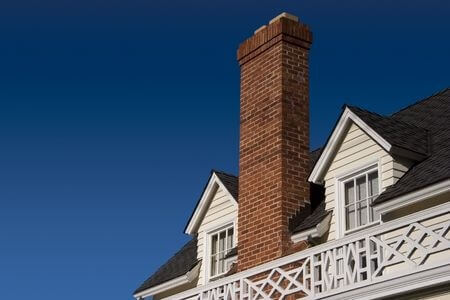
Chimneys made out of masonry are generally the heaviest part of the house and are made out of noncombustible materials such as brick, stones or concrete blocks.
Therefore, footings require enough strength to hold the chimney’s weight without settling and they need to be placed on well-compacted soil.
- Footings need to extend no less than 6-inches beyond all four edges of the chimney.
- For single-story homes, the footings need to be 8-inches thick.
- For two-story homes, the footing needs to be 12-inches thick.
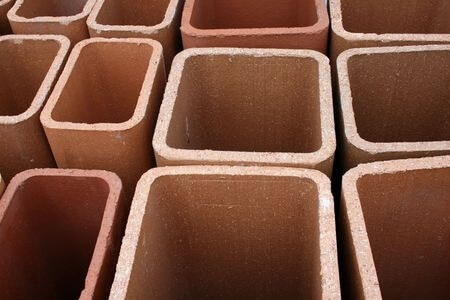
- Line masonry chimneys with flue tile, which withstands rapid changes in temperatures and doesn’t crack, but has a smooth side to make cleaning the chimney easier. Use a flue tile that is a minimum of 5/8-inches thick.
- A gap of 1-inch is required between the outside of the tiled flue and brick surrounding it to reduce any chimney heat loss, which in turn improves draft.
- It’s imperative that the masonry chimney has at least a 2-inch space on all four sides between it and any combustible materials, which includes wood framing, ceilings and the floor. Fill the space with a noncombustible material such as sheet metal.
- Wall thickness in residential homes for masonry chimneys needs to be a minimum of 4-inches thick.
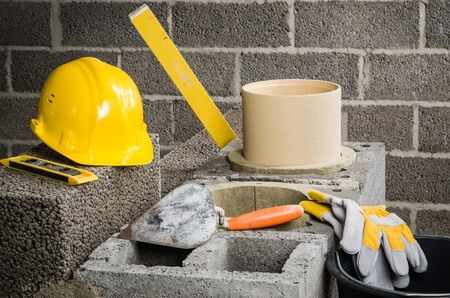
How To Build A Chimney - Supplies
Before you jump up and start building the chimney, make sure you have all your basic supplies on hand so you don’t have to stop in the middle of the project and run to the store.
Masonry Chimney Supplies:
- Bricks, concrete blocks or stone for the structure, cement mortar (a mix of one-part Portland cement, one-part hydrated lime and six parts builder’s sand is recommended), flashing, precast chimney cap made of concrete or stone, sheet metal and masonry tools such as a masonry trowel and level.
Tip: If you are building the chimney to vent a fireplace, use the same or similar type of brick that matches the fireplace’s hearth.
How To Build A Chimney - Construction
When building the chimney you should always work from the ground upward, which usually means you will start the project on top of the fireplace, if the chimney’s purpose is venting a fireplace.
Make sure you are building the chimney on a reinforced concrete pad.
If not, you will have to lay a pad of concrete 8 to 12 inches thick before you build the chimney, depending on how many stories the house has.
- Mix the mortar with the suggested portions of cement, lime and builders sand. The consistency is right when the mix resembles the thickness of peanut butter. Using the masonry trowel, layer each brick with enough mortar that it oozes out between the joints. This guarantees the joints are filled without any air space.
- Lay the brinks on top of each other, building up the chimney’s walls on each side. Periodically use a level to make sure the brick wall is level both horizontally and vertically. Adjust if needed before the mortar dries.
- As you are building the outside of the chimney, lay the flue tiles at the same time and use the mortar to seal them together. If the chimney becomes too high before you install the flue tiles, it makes it difficult to impossible to install them.
- Once the chimney is built, install sheet metal on all four sides of the 2-inch opening between the outside of the chimney and the combustible materials.
- Install metal flashing where the chimney goes out through the walls. Use the flashing where the chimney and roof meet and as a lining installed under the chimney cap. Seal the flashing using waterproof silicone caulk.
- Install the chimney cap over the top portion of the brick flue housing, making sure it extends past the wall of the chimney by a minimum of 2-inches and isn’t sloped toward the flue but away from the structure. Make sure the cap has a an edge that allows water to flow away from the chimney to reduce moisture from coming inside.
How To Build A Chimney - Overall
Learning how to build a chimney is a task many homeowners can accomplish on their own.
However, if you have any concerns or you're not comfortable working with masonry equipment, error on the side of caution and hire a professional.

About the Author
Obsessed with firewood, Nick is behind over 350+ of Firewood For Life's articles, as well as countless reviews, guides and YouTube videos to help readers like you reduce heating costs and create the perfect fire.
Recent Articles
-
Firewood Measurements - Firewood Cord Calculator
 Firewood measurements such as a cord, face cord or rick can be confusing. Use this free firewood calculator to determine exactly how much firewood you have.
 -
Alder Firewood - A Good Firewood Choice?
 Should you burn alder firewood in a fireplace, wood stove or campfire? Learn how to split, stack and dry alder for the best results.
 -
Firewood Rack Assembly Instructions - Build Your Own Log Rack
 Use these easy to follow firewood rack assembly instructions to build your own rugged and durable outdoor firewood rack.