- Home
- Storing Firewood
- Firewood Shed Plans
Firewood Shed Plans
This post may contain affiliate links so I earn a commission.
These firewood shed plans were designed to give you an easy, affordable way to build your own firewood shed.
A good firewood shed should accomplish a few things.
First, it should be placed in a location that's easily accessible.
You don't necessarily want it adjacent to your home because firewood can attract bugs and rodents, but you want it close enough to make the wood easy to grab when it's time to use it.
The shed we built in this article was placed about 30-40 yards from the home.
Second, it should allow wind and sunlight to reach the firewood to allow the wood to dry.
By building a shed with slatted sides without being completely enclosed, it allows the warm summer sun and winds to reach the wood allowing it to season faster and reduce the chance of mold.
Finally, the shed should have a roof to prevent rain and snow from contacting the firewood.
Plus, adding a pallet floor will raise the firewood off the ground, reducing the chance of the firewood soaking up ground moisture.
It also allows the wind to circulate on all sides of the wood.
Since these free firewood shed plans use these important features you'll have a great shed that will last many years and keep your firewood protected, seasoned and ready to use.
Firewood Shed Plans - Construction
Considering the shed is outdoors and exposed to the elements, use treated lumber for the construction.
Also, if needed you should check your local building codes to make sure the shed meets local requirements if necessary.
I had some leftover lumber and screws from a recent project so I was able to cut down on some of the construction costs.
In total, I estimate the firewood shed costs about $550 to build which includes all lumber, fasteners and roofing.
These firewood shed plans will build a wood shed that measures 10 feet wide by 8 feet deep which is enough to store a full winters supply of my firewood.
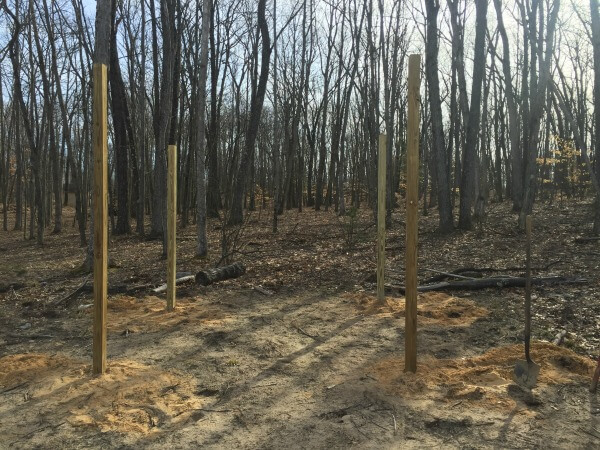
Begin by setting 4 treated 12 foot long 4x4 posts spaced 10 feet wide and 8 feet deep.
You'll want to make sure the posts are square, so the shed is square throughout construction.
I used 12 foot long posts to make sure they were tall enough after they were set.
You will cut the tops off later to the proper lengths.
To set the posts, make sure they are deeper than the frost line.
I added a 1/2 bag of Quikrete to each post to make sure they were solid.

Use a level to make sure each post is completely level and square.

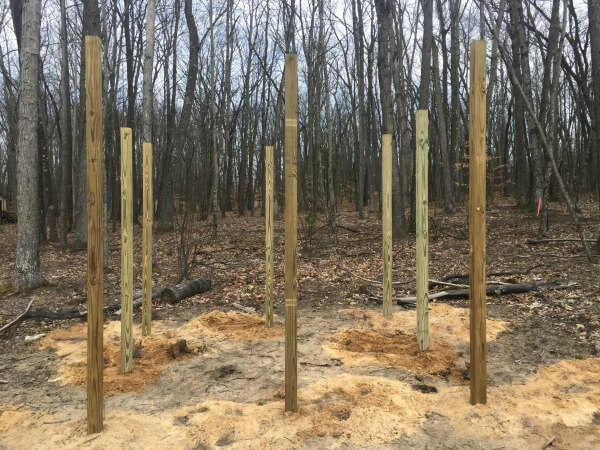
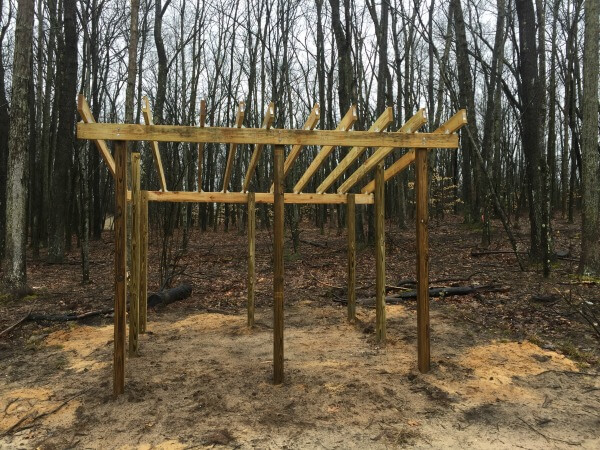
Once you have the first 4 corner posts in place, set 3 additional 12 foot 4x4's spaced equally on all sides.
When finished you should have 8 4x4's total as shown in the picture below.
Next, attach a 12 foot 2x6 cross beam across the front section of the shed.
This will determine your roof height.
I set mine at 94 inches because I don't want to worry about hitting my head as I walk in and out of the shed.
Plus, the extra height gives enough room to slope the roof towards the back of the shed for proper pitch.
Attach the 12 foot 2x6 cross beam using lag screws and 3.5'' deck screws.
By using the 12 foot 2x6 you will have a 1 foot overhang on each end.
This allows the roof to overhang the side of the shed adding more protection to your firewood.
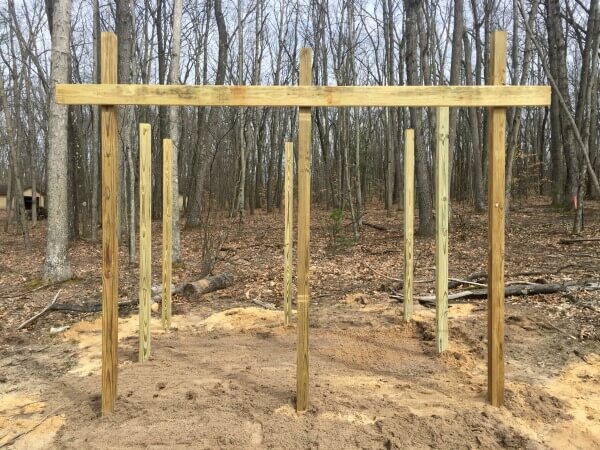
The picture below shows a second 12 foot 2x6 cross beam placed on the back of the shed attached using lag screws and 3.5'' deck screws.
This 2x6 was set to a height allowing a 2/12 roof pitch.
After the front and back cross beams are attached, you can cut off the tops of the 4x4's flush to the top of the cross beam.
Do not cut the side 4x4's.
You will cut these at a later time.
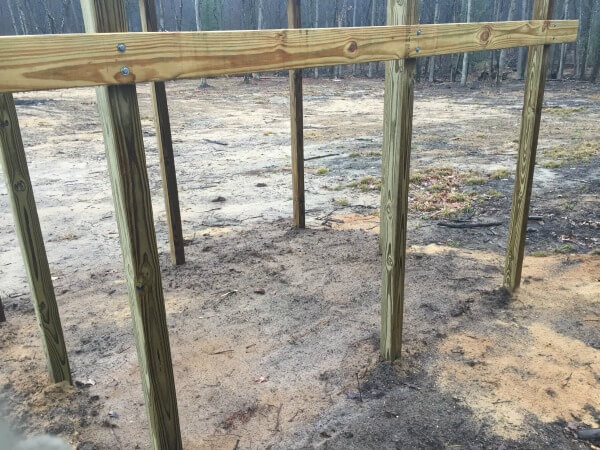
Next, to set the rafters, I used hurricane clips because they're inexpensive and make setting the rafters a lot easier.
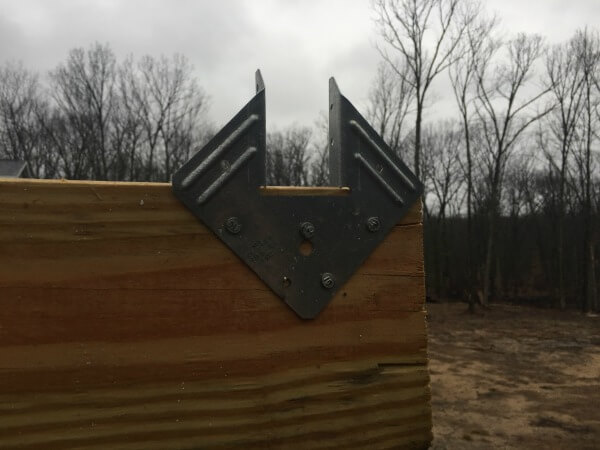
The picture below shows a 10 foot 2x6 set into the hurricane clip.
By using a 10 foot 2x6 for the rafters, you'll have about a 1 foot overhang on the front and back of the shed.
They make special nails called joist hanger nails that I used to attach the hurricane clips and the trusses.
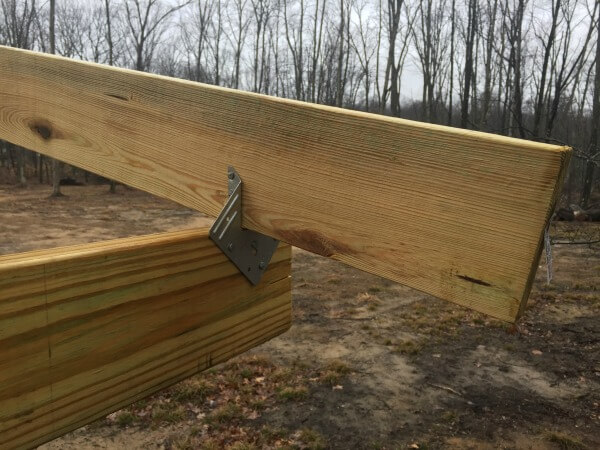
Space the 10 foot 2x6 trusses evenly across the shed as shown below.
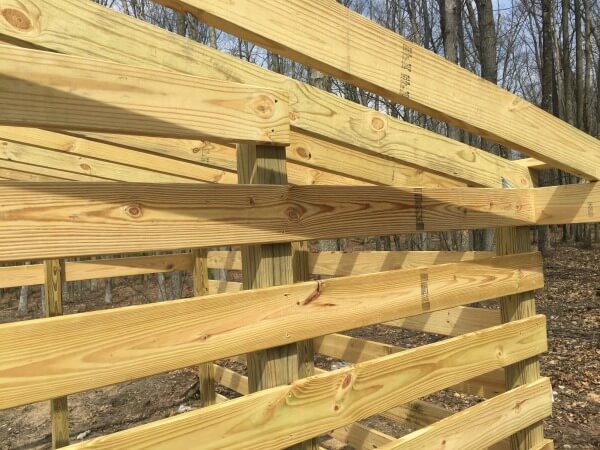
Next attach 10 foot treated deck boards to the back of the shed.
I spaced each deck board at 4 inches which is enough to help protect the wood but also allow proper air flow into the shed.
I used 3.5'' deck screws to attach the deck boards.
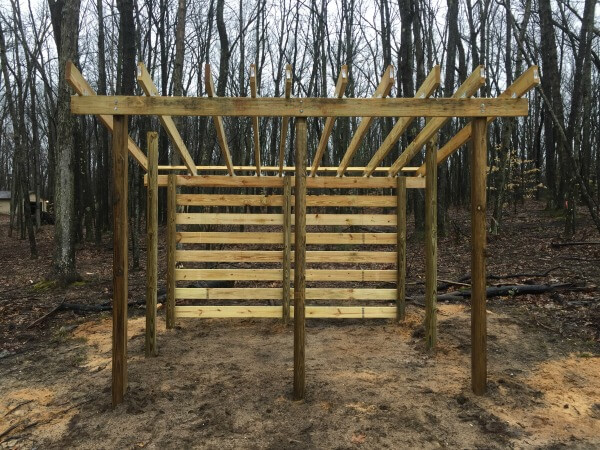
Here's a closer view of the deck boards attached to the back of the shed.

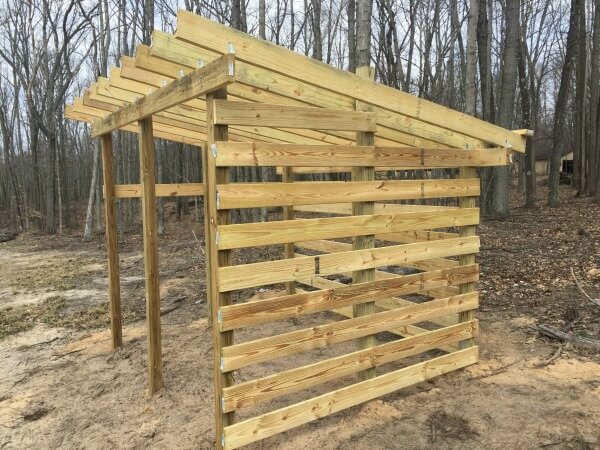
Next in the firewood shed plans, attach 8 foot deck boards to the sides of the shed.
You'll notice the top board is only half length due to the slope of the roof.
After the final deck board is attached, cut the side 4x4 off flush to the top of this deck board.
Here's a closer view of the side 4x4 after it was cut off.
Now, repeat this process on the other side of the shed.
Next, attach 12 foot 2x4 battens across the top of the trusses.
They were spaced evenly and attached lying flat on their sides.
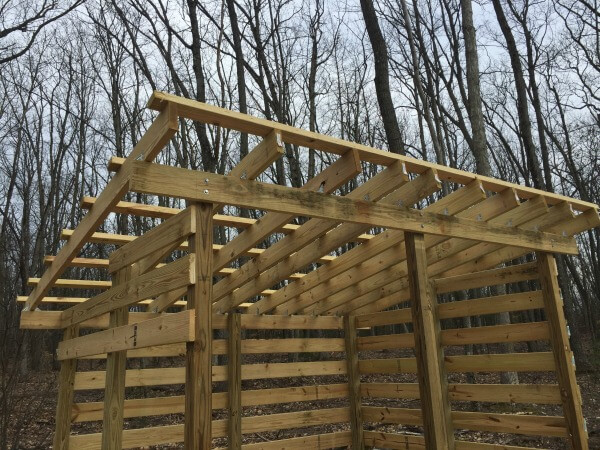
This picture shows the completed sides along with the 2x4 battens attached across the trusses.
Another view.
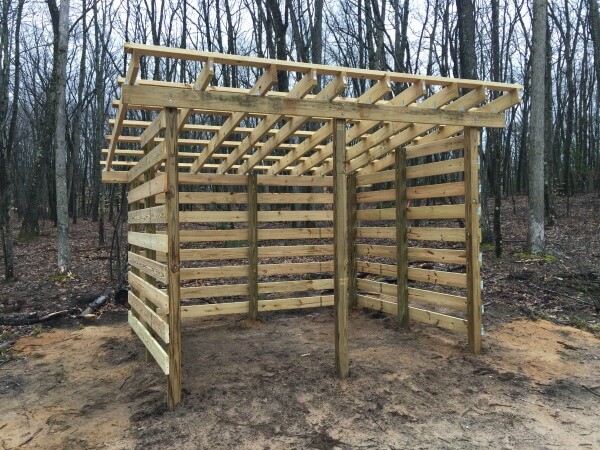
Next, I attached support braces set on a 45 degree angle to each of the outside corners, front and back.
I had some extra 2x4's laying around or you could also use a 2x6.

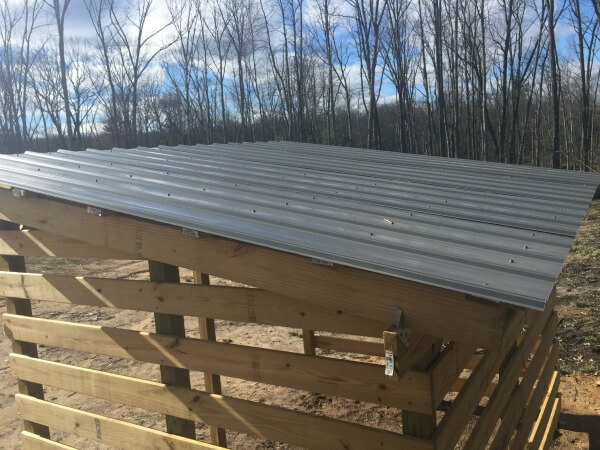
I chose a steel roof for the shed because they're affordable and easy to install.
The steel roof can be custom ordered to size and in what ever color you want.
Attach the roof using steel roofing screws designed for steel roof installation.
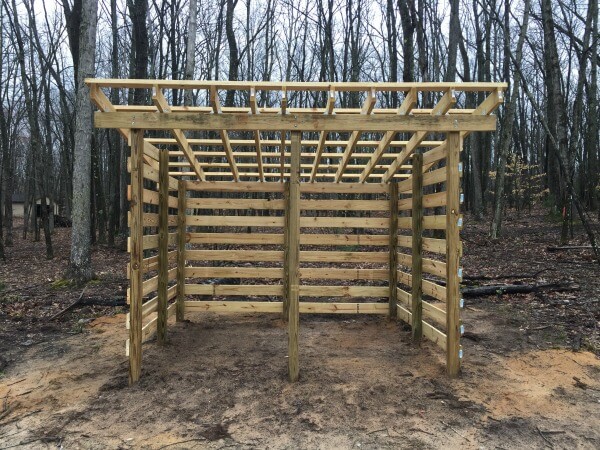
Finally, I used 4 pallets in these firewood shed plans for the flooring.
The pallets work great and fit almost perfectly.
I had to notch out a couple to fit around the 4x4 posts, but the pallets allow the firewood to be elevated off the ground, they're stable and they look great too!
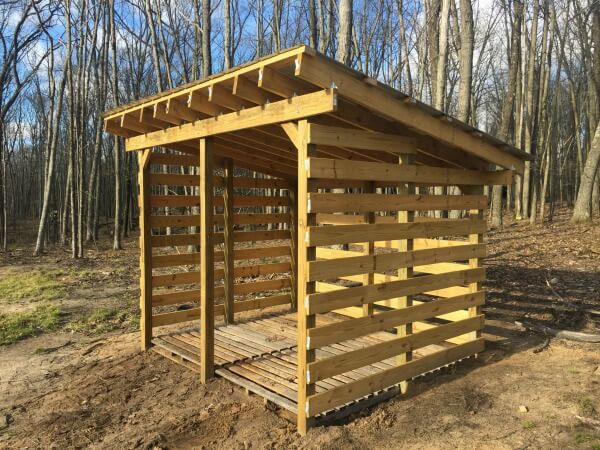
That's it.....you're done!
The above picture shows the completed firewood shed.
Firewood Shed Plans - Overall
By using these firewood shed plans you'll be able to build your own firewood shed that's sturdy, looks great and will last for many years.
This shed took me about one week to build by myself and I worked on it periodically in my spare time.
With a little help, you could probably build it in a weekend.

About the Author
Obsessed with firewood, Nick is behind over 350+ of Firewood For Life's articles, as well as countless reviews, guides and YouTube videos to help readers like you reduce heating costs and create the perfect fire.
Recent Articles
-
Firewood Measurements - Firewood Cord Calculator
 Firewood measurements such as a cord, face cord or rick can be confusing. Use this free firewood calculator to determine exactly how much firewood you have.
 -
Alder Firewood - A Good Firewood Choice?
 Should you burn alder firewood in a fireplace, wood stove or campfire? Learn how to split, stack and dry alder for the best results.
 -
Firewood Rack Assembly Instructions - Build Your Own Log Rack
 Use these easy to follow firewood rack assembly instructions to build your own rugged and durable outdoor firewood rack.